The glitter sensory bottles are so much fun for the kids to make and play with! Add them to your list of sensory bottles for preschoolers!
Sensory bottles are an especially useful tool in the preschool classroom. Preschoolers may be small, but they often have such big emotions. It’s important to have extra tools in your belt to help the children manage their emotions. And these sparkly discovery bottles are a great tool for self regulation!
I love watching the kids’ amazement as they engage with the sensory bottles, but I also like to let them in on the process of making them! So, gather the few items needed and give a simple science lesson as you work together with the students to create the glitter sensory bottles.
Related: 15+ St. Patrick’s Day Sensory Bottles
The sparkly sensory bottles will be fun all year long, but I think they’ll pack an even bigger punch as we celebrate the New Year!
If these glitter sensory bottles are hit in your classroom, be sure to make some new year slime as well! These two activities are sure to fill all of your students’ sensory needs as the year begins.
Learning with Sensory Bottles
In case you were wondering, these are more than just a pretty face. Yes, the glitter sensory bottles are glittery and beautiful, but they also have even more redeeming aspects. Here are just a few:
- Children can work on early math skills as they measure ingredients and count amounts.
- Scientific exploration is an inherent part of making discovery jars. Ask the kids what they think would happen if different substances were used. What about adding more or less water? Then let them explore their hypothesis while making the jars.
- Glitter bottles are the best calm down jars. Let the kids shake the bottles and watch as the glitter flows and slowly settles. Add in some music for an even more calming effect.

Related: Learn How to Make Metallic Silver Slime
How to make silver and gold glitter sensory bottles
I may get commissions for purchases made through links in this post.
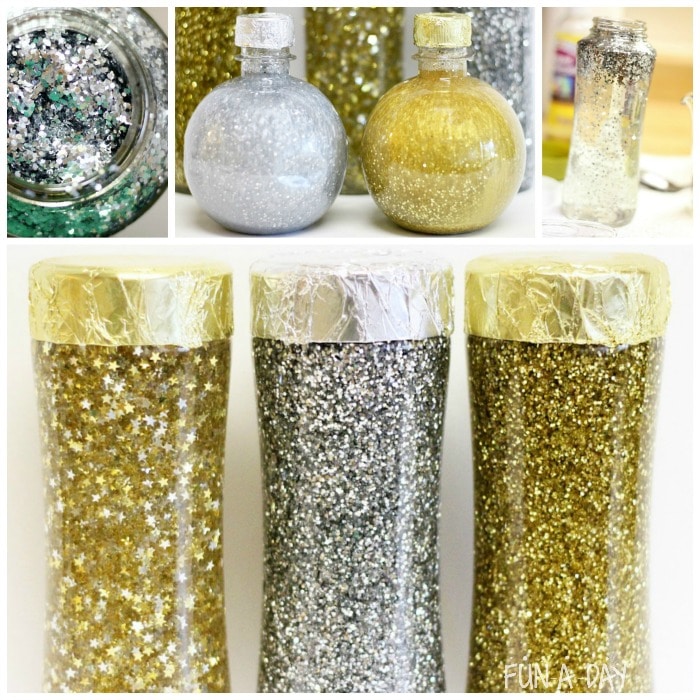
Grab some empty and clean bottles to start off with. We ended up using two different types of bottles this time around. The round plastic jars are leftover from a flavored water drink, but you can find empty round bottles for a few dollars each at your local craft store. The taller glass jars are leftover from a tea phase I went through for a while. Take care and only use glass bottles with children who will be appropriately gentle with them, of course.

To make the round bottles, we added a bottle of clear glue directly into the bottle. Then we added a few squirts of metallic liquid watercolors (silver in one jar, gold in the other). Glitter was added, too, followed closely by warm water. We put the tops on the jars and gave them a very thorough shake. For the silver jar, I put tinfoil around the cap. I used gold candy wrap for the top of the golden bottle.

Next up were the tall, super glittery sensory jars. For these, I used my favorite “secret” ingredient – light corn syrup! I just love how it makes the glitter swirl and float around. The glass bottles hold about two cups of liquid, so I used one-and-a-half cups of corn syrup and about half a cup of hot water.
The trick is to mix the corn syrup and hot water together in a large measuring cup. When you first start mixing, the liquid will look a little cloudy. As they combine, the liquid goes back to looking clear.
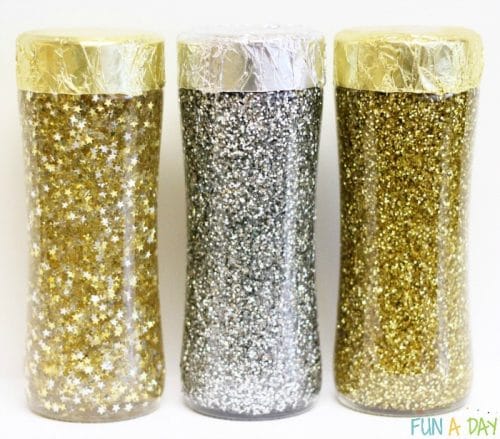
We added the corn syrup and water mixture to the empty bottles, followed by four tablespoons of glitter. One jar got silver glitter, one got gold glitter, and one got silver and gold stars. Then we screwed the tops on each bottle and gave them all a good shake. Like the round bottles, we put tin foil and gold candy wrap along the tops.
Have you every made glitter sensory bottles with the kiddos? We had a blast making these and playing with them. The round bottles made me think of the ball drop in New York City, but I have to admit the taller super glittery jars are my favorite.
Done-for-You Preschool Resources
Planning meaningful lessons for students week after week, all while balancing other teaching responsibilities and a personal life, can be a daunting task. That’s where Preschool Teacher 101 comes in to save you time!
Preschool Teacher 101 is excited to share with you some amazing lesson plans, activity packs, and much more! We offer a wide variety of themes that are frequently used in preschool classrooms, as well as some less common (but super interesting) themes. Click on the image below to learn more about our Twinkle, Twinkle, Little Star lesson plans!

Join The Pack from Preschool Teacher 101 today for exclusive access to our amazing products. And we even have three different membership options to suit your needs!

Leave a Reply