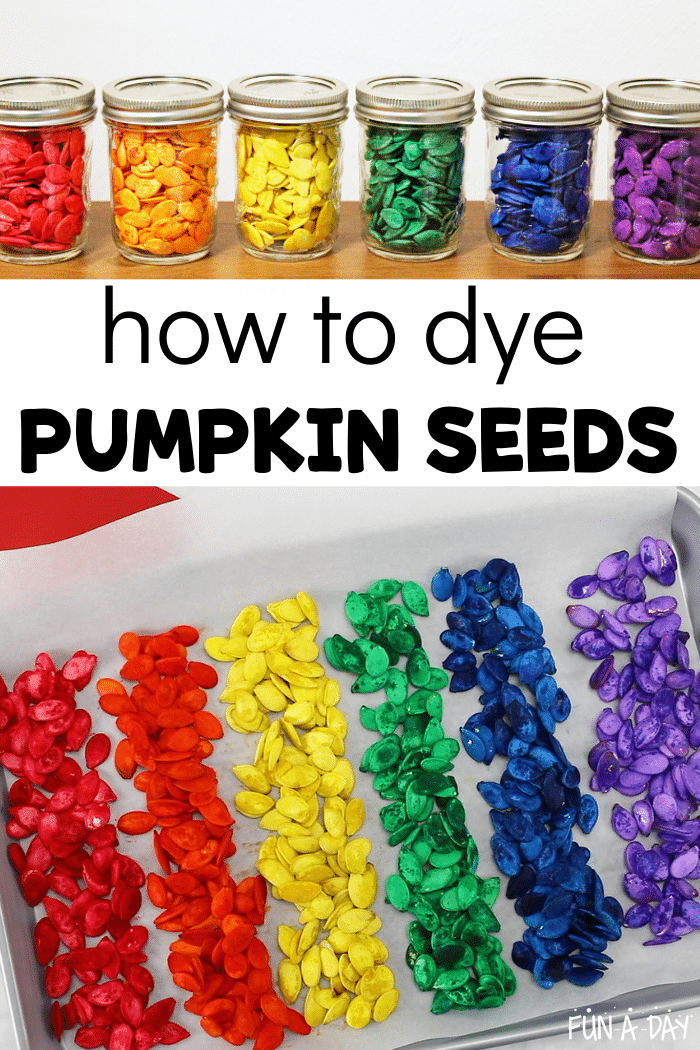
Learn how to dye pumpkin seeds with your students. You can use them with so many fall activities for preschoolers. In fact, they can be used all year long!
Read below about a super simple dyeing method for pumpkin seeds, and how to use them in discovery bottles (and more). You’ll definitely want to add this to your list of preschool pumpkin activities.
Related: How to Dye Corn Kernels
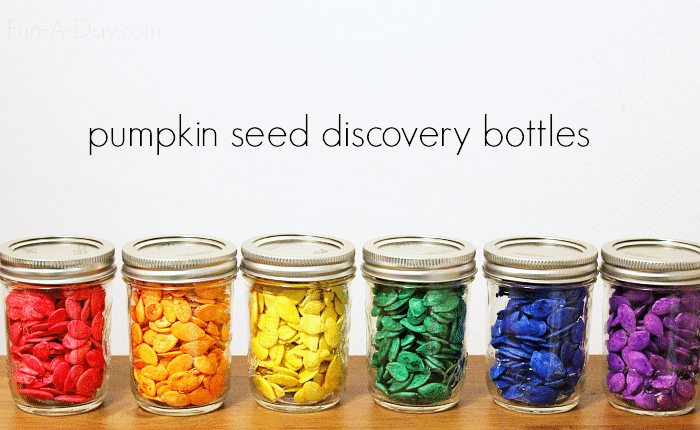
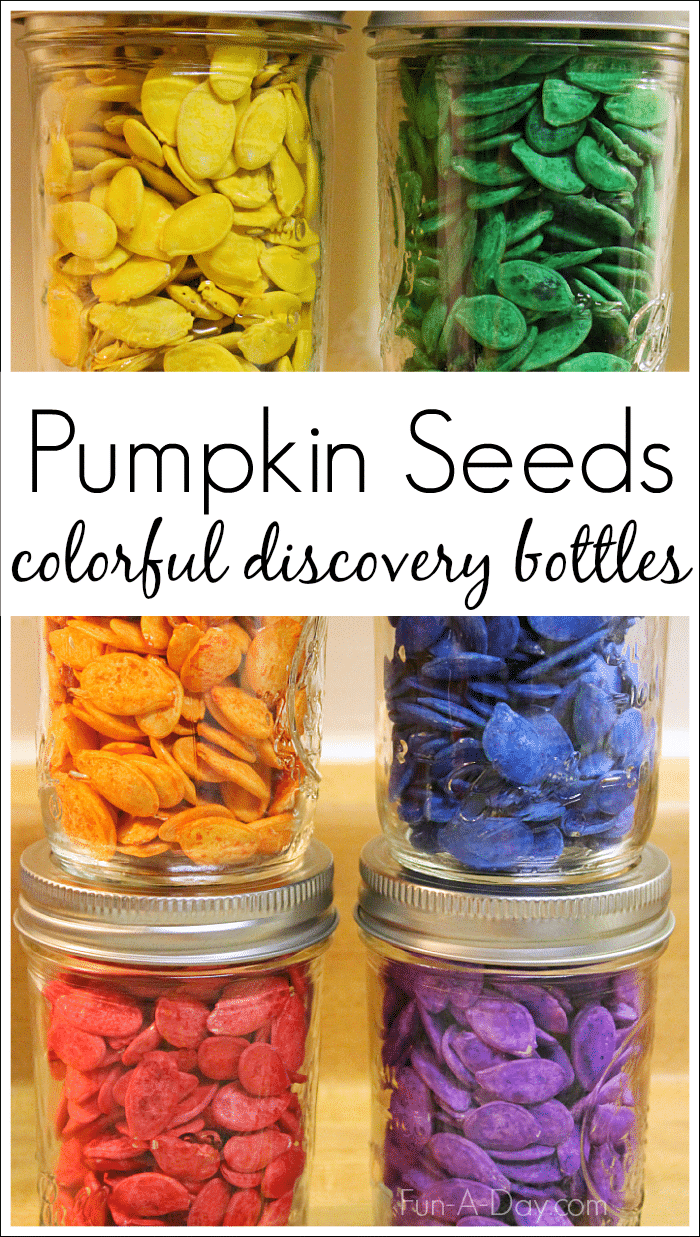
These colorful, fun discovery bottles were inspired by our pumpkin seed names.
I loved loved loved how the dyed pumpkin seeds turned out, and I knew I wanted to do more with them!
Now, of course I didn’t just make these because I loved them. I wanted to explore making these pumpkin discovery bottles because of how much the students loved the dyed pumpkin seeds.
They were so incredibly engaged when using the seeds to build their names. So I knew that they would be engaged with another activity that used the colorful seeds.
There’s just something about a rainbow of colors that grabs kids’ interests.
So why not run with it to explore a wide variety of early childhood concepts?
How to Dye Pumpkin Seeds
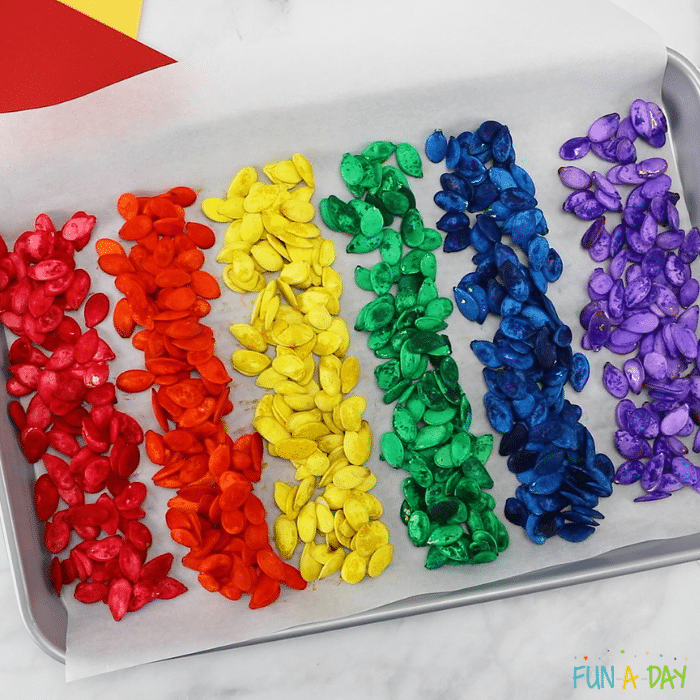
Before you can make colorful pumpkin seed discovery bottles, you need colorful pumpkin seeds.
They were easy peasy to make! My son helped me make the first batch, and preschool students are definitely capable of helping with this process.
So many great conversations can take place during this time.
Related: Colorful Fall Tree Pumpkin Seed Art
Materials to Dye Pumpkin Seeds
Here’s what we used for the dyed seeds (I may get commissions for purchases made through links in this post):
Yes, that’s it!
I wasn’t joking when I said the method is a super simple one.
Dyeing Pumpkin Seeds
Since I didn’t have many colorful pumpkin seeds leftover from last year, the kiddo helped me make some more. He’d been asking me how to dye pumpkin seeds and was thrilled to help.
It’s a super easy process, and the seeds didn’t take long to dry.
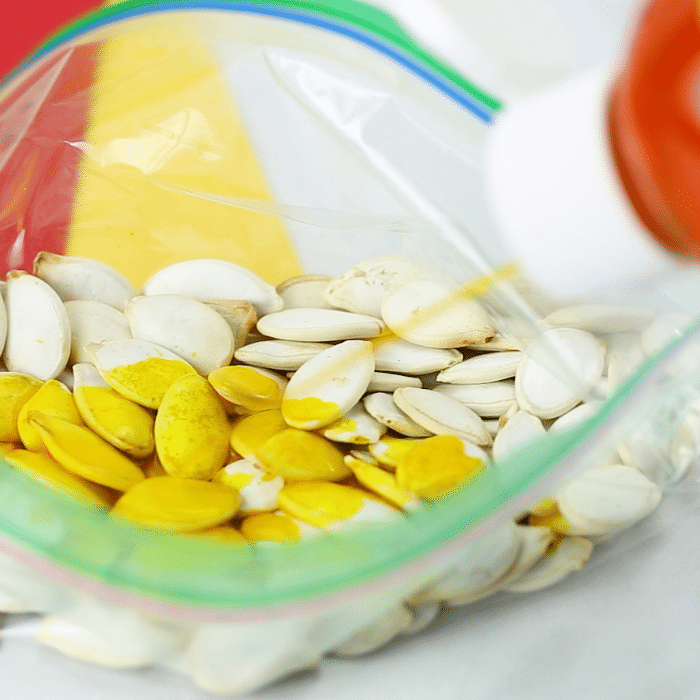
First, place the seeds into a baggie or container.
Next, add a few squirts of liquid watercolors and seal the baggie.
Related: Pumpkin Life Cycle Printable Book
Then shake everything up until the pumpkin seeds are colorful. Add more watercolors if need be, and shake again.
Spread the dyed pumpkin seeds on a tray or a plate to dry.
Once they’re dry, the seeds may need to be separated a bit. I had a few that stuck together, but it wasn’t difficult to break them apart.
Fall Discovery Bottles with Dyed Pumpkin Seeds
Now that you know how to dye pumpkin seeds, it’s time to make the sensory bottles I was talking about.
Once again, this isn’t a super difficult undertaking by any means.
Get those kids involved in helping put the pumpkin discovery bottles together.
Related: Pumpkin Seed Activities
Assemble the Discovery Bottles
I decided to keep the colors separated to start off with – a rainbow of pumpkin seed discovery bottles!
So my son and I scooped the seeds up by color and tossed them into the jars. Then the lids went on, and everything was ready to go!
With younger children, I’d suggest using plastic bottles. They’re not as heavy, and they’re harder to break.
Additionally, hot gluing the tops of the bottles is a good idea with little ones.
Using the Pumpkin Seed Sensory Bottles
These sensory jars are perfect for the preschool science or sensory centers!
The children can observe the colors and shapes. They can even take some time to explore how the seeds sound when shaken up!
Here are a few more ways the pumpkin seed jars could be used:
- Add some lettered beads into the jars. Have the children see if they can find letters from their names.
- Add different materials that are the same colors. The kids can compare and contrast what the materials look like.
- Hide small items in the discovery bottles. The children can keep track of what items they find inside.
How would you use these pumpkin discovery bottles with the kids?
What would your kids make now that you know how to dye pumpkin seeds? So many possibilities!
More Dry Ingredient Discovery Bottles
Check out some more discovery bottles that use dry ingredients:
Candy Corn Discovery Bottle from Preschool Inspirations
Alphabet Discovery Bottle from The OT Toolbox
5 Little Pumpkins Discovery Bottle from Modern Preschool
Preschool Teaching Made Easier
Save yourself a LOT of planning time with Preschool Teacher 101.
There’s an amazing array of done-for-you preschool activities and lesson plans just waiting to help you out. Be sure to check out the membership options to have an even bigger impact.
Click on the photos below for more information on each resource:
Originally published September 2015.
Cute idea and super colourful!
I understand how to color the seeds but I have been looking for the instructions on how to make the sensory bottle and the liquids that goes in to the bottle to make the pumpkin seeds look as though they are dancing CAN YOU HELP 1111 PLEASE
I haven’t made a wet sensory bottle with the dyed pumpkin seeds, as I don’t think the dye would handle being submerged in liquid. If you just want to try the pumpkin seeds themselves, you could try the recipe from this sensory bottle or replace the corn in this hopping corn activity.
Does the dye come off the seeds if I was to rinse them to get the extra off? I have 5 cups i dyed!
I’ve never tried to rinse the dye off the seeds, so I can’t give you a definitive answer. My inclination would be yes.
Loving this for my residents in aged care.
Rosemarie, I just love hearing that! Let me know what they think!
My daughters and I would like to do this with the grandkids. How long does it take the pumpkin seeds to dry out after they are dyed and spread out? Hopefully we can do some activities with then on the same day.
Hi Cynthia! I need to time how long it takes for them to dry the next time we make some (we had extras last year so we’re set for now). As long as the seeds aren’t oversaturated, I believe just a few hours if using liquid watercolors (possibly less). So if you make them the night before or at the start of the day, that should work – but I’m not 100% positive. Let me know if you give them a try!!!
I love the Fall Tree masterpiece!
I’m curious… no alcohol needed for coloring the pumpkin seeds? I’ve colored rice, often, and recently colored dried chick peas. The process usually calls for alcohol in addition to the color (water color, food coloring).
Thanks, in advance, for clarifying!
Hi Lori! No, we just used the liquid watercolors! In fact, that’s how I most often dye chickpeas, too – just liquid watercolor. I hope that helps. 🙂
What type of glue did you use to attach the seeds to the tree?
Hi Bonnie! It’s listed on the materials list of the fall tree art – we just used regular white glue. I’ve also used clear glue in the past and it worked well. I wouldn’t suggest glue sticks, as those didn’t work as well when we used it.