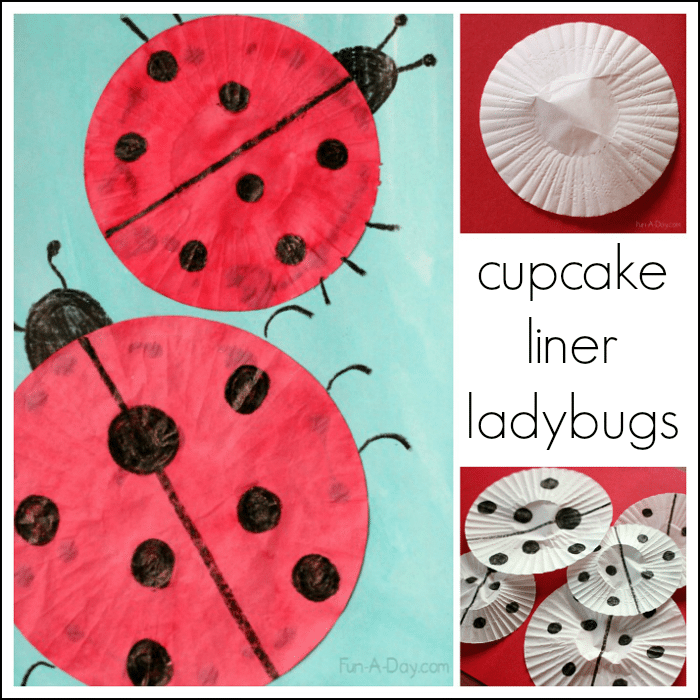
This oh so very simple ladybug craft helps children explore science and art concepts. The cupcake liner ladybug is one of my favorite preschool art projects for an insect theme!
Be sure to check out the bottom of this post for more #PLAYfulpreschool ladybug ideas.
cupcake liner ladybug craft for kids
I may get commissions for purchases made through links in this post.
Materials
White cupcake liners (we used large and small)
White paper
Watercolors (we used blue and red liquid watercolors)
Black crayon
Directions
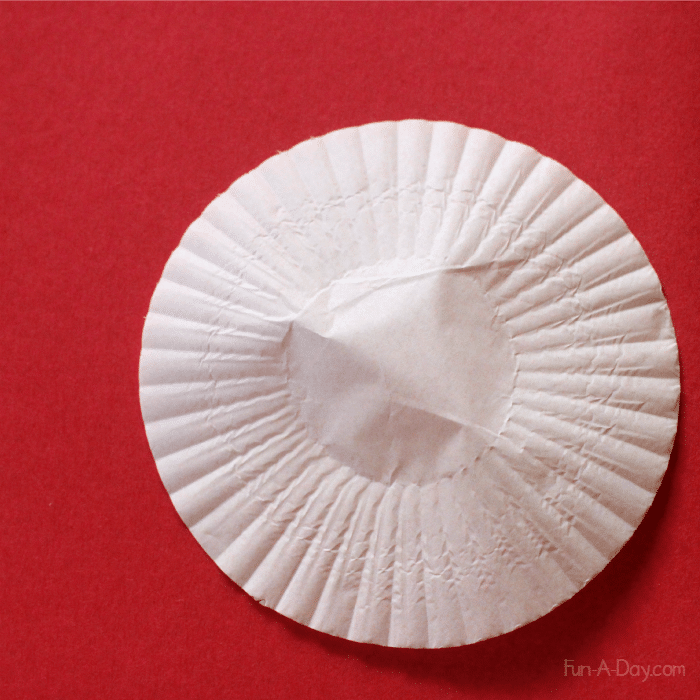
Take a white cupcake liner and flatten it out as much as possible.
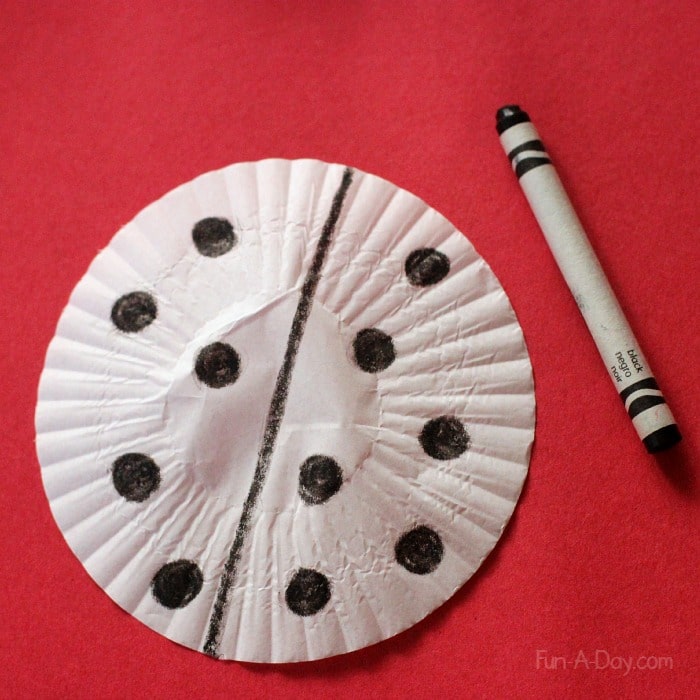
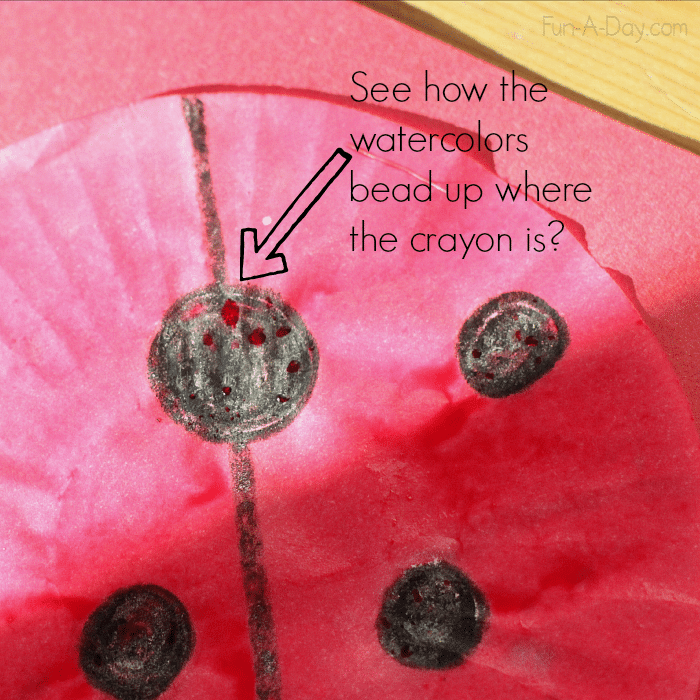
Grab a black crayon and draw a line down the center of the cupcake liner. This delineates the ladybug’s wings. Draw black dots along the cupcake liner. Be sure to press the crayon down hard (but not so hard that you break a crayon . . . not that my son and I are speaking from experience or anything)! 😉
Grab a paintbrush and paint the cupcake liner. We stuck with red, as the ladybugs around her are usually red. This is a great time to talk about how crayons resist watercolors due to the wax they contain. Take a look at how the watercolors bead up on top of the black dots and lines, but is absorbed into the cupcake liner.
Paint a white piece of paper blue. Watercolor paper would probably be best, but we didn’t have any on-hand so we used printer paper instead. It worked just fine!
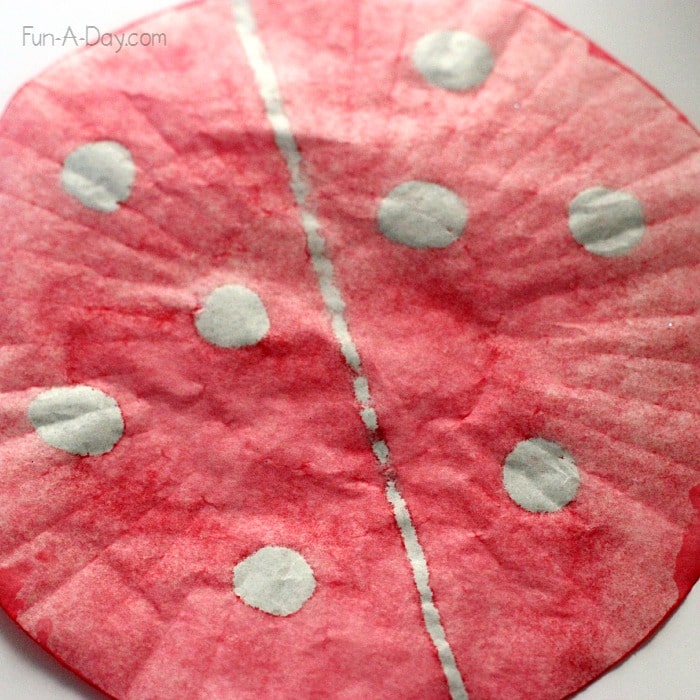
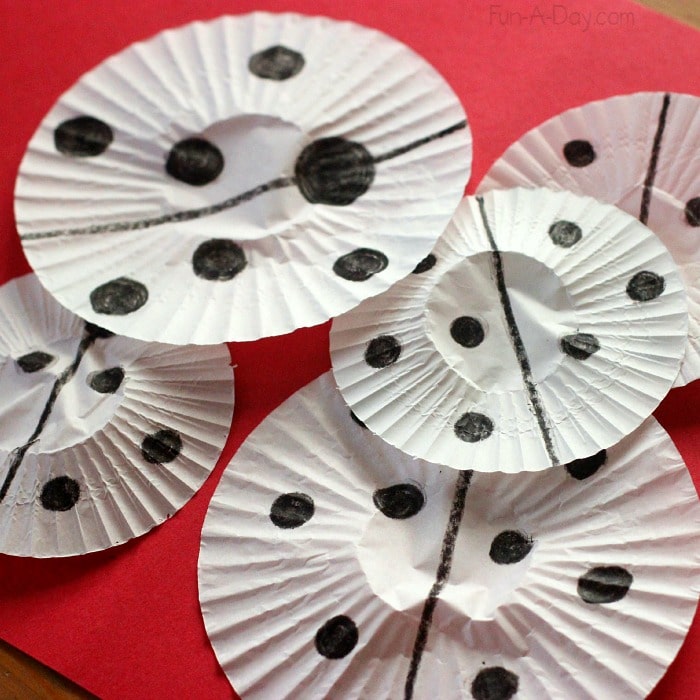
Once the cupcake liners are dry, turn them over for another indicator of crayons’ water resistance. It’s very apparent that the black crayon kept the watercolors from being absorbed into those sections of the liners!
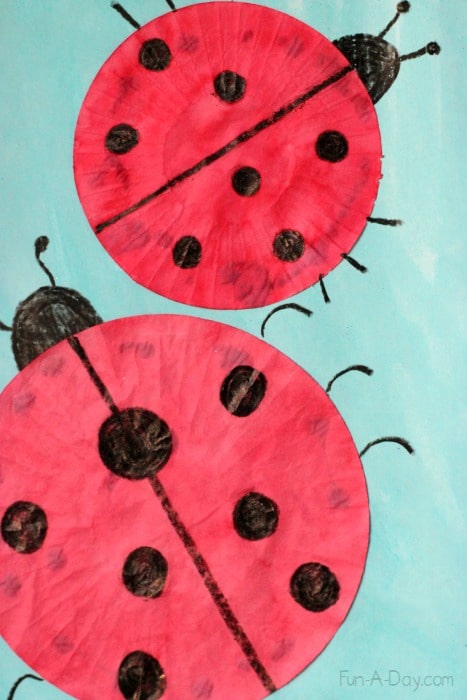
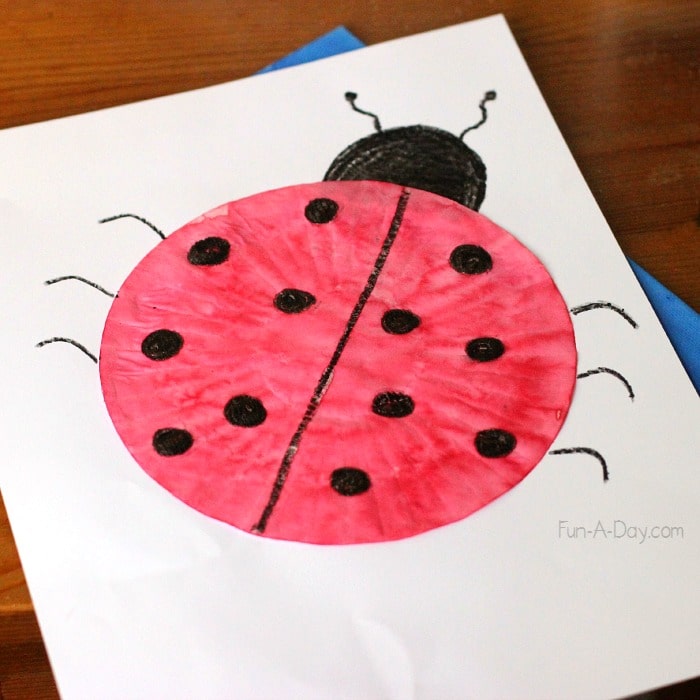
Glue the cupcake liner ladybugs onto the (now dry) blue pieces of paper. Add a head, antennae, and six legs! If you’re like us, you may need to repeat the process because you’re having too much fun to stop. There’s just something therapeutic about crayons and watercolors!
The learning
I think this ladybug craft could be used to learn concepts across the board! Here are some of the ideas that came to my mind first:
- The wax in crayons resists watercolors. This is an art technique used by many people.
- Ladybugs are insects, which means they have 6 legs.
- Ladybugs come in different colors, although the 7-Spotted Ladybug is the most common where we live. It has 3 spots on each side, with an additional spot in the middle.
- There are thousands of types of ladybugs.
Change it up
It would be so easy to adapt this activity! Change the colors of the ladybugs, be more detailed when drawing the ladybugs’ bodies, or add a writing prompt to this little art activity. Cut out heads and legs from construction paper, then decorate with the ladybugs – they’re cheerful enough! Change this into a math and art activity, letting the roll of the dice determine the amount of spots added to the ladybugs. I could go on and on (but won’t, I promise)!
Have you done a ladybug craft with the kiddos before? Would they enjoy this one? Be sure to let me know if you give this idea a try! 🙂
Check out more ladybug-themed #PLAYfulpreschool ideas:
Done-for-You Preschool Resources
Planning meaningful lessons for students week after week, all while balancing other teaching responsibilities and a personal life, can be a daunting task. That’s where Preschool Teacher 101 comes in to save you time!
Preschool Teacher 101 is excited to share with you some amazing lesson plans, activity packs, and much more! We offer a wide variety of themes that are frequently used in preschool classrooms, as well as some less common (but super interesting) themes. Click on the images below to learn more about our ladybug and other insect-themed product offerings.


Join The Pack from Preschool Teacher 101 today for exclusive access to our amazing products. And we even have three different membership options to suit your needs!

Ohhh I love this – wax resist art is so much fun. Will have to give this a go with my kids this week.
I love this idea! They turned out SO cute!
These came out great! We so love crayon resist!
What a fantastic way to use crayon resist. It must be magical for kids to see the ladybugs ‘appear’ when they are painted red.
Such a super cute craft!
Really cute, my girls would very much enjoy this.